3D Gaussian Splatting, first presented at SIGGRAPH 2023, is rapidly gaining attention across industries such as real estate, construction, manufacturing, and autonomous driving. As of 2026, major companies including NVIDIA are accelerating their research and implementation, and the technology is emerging as a de facto standard. Continuing from articles published in March and April, XR Expert Yoshinaga from Avaxia Asia offers a practical guide to the basic workflow for running the technology with a minimal setup.
Introduction
This is Yoshinaga from the Data Integration and Development Division.
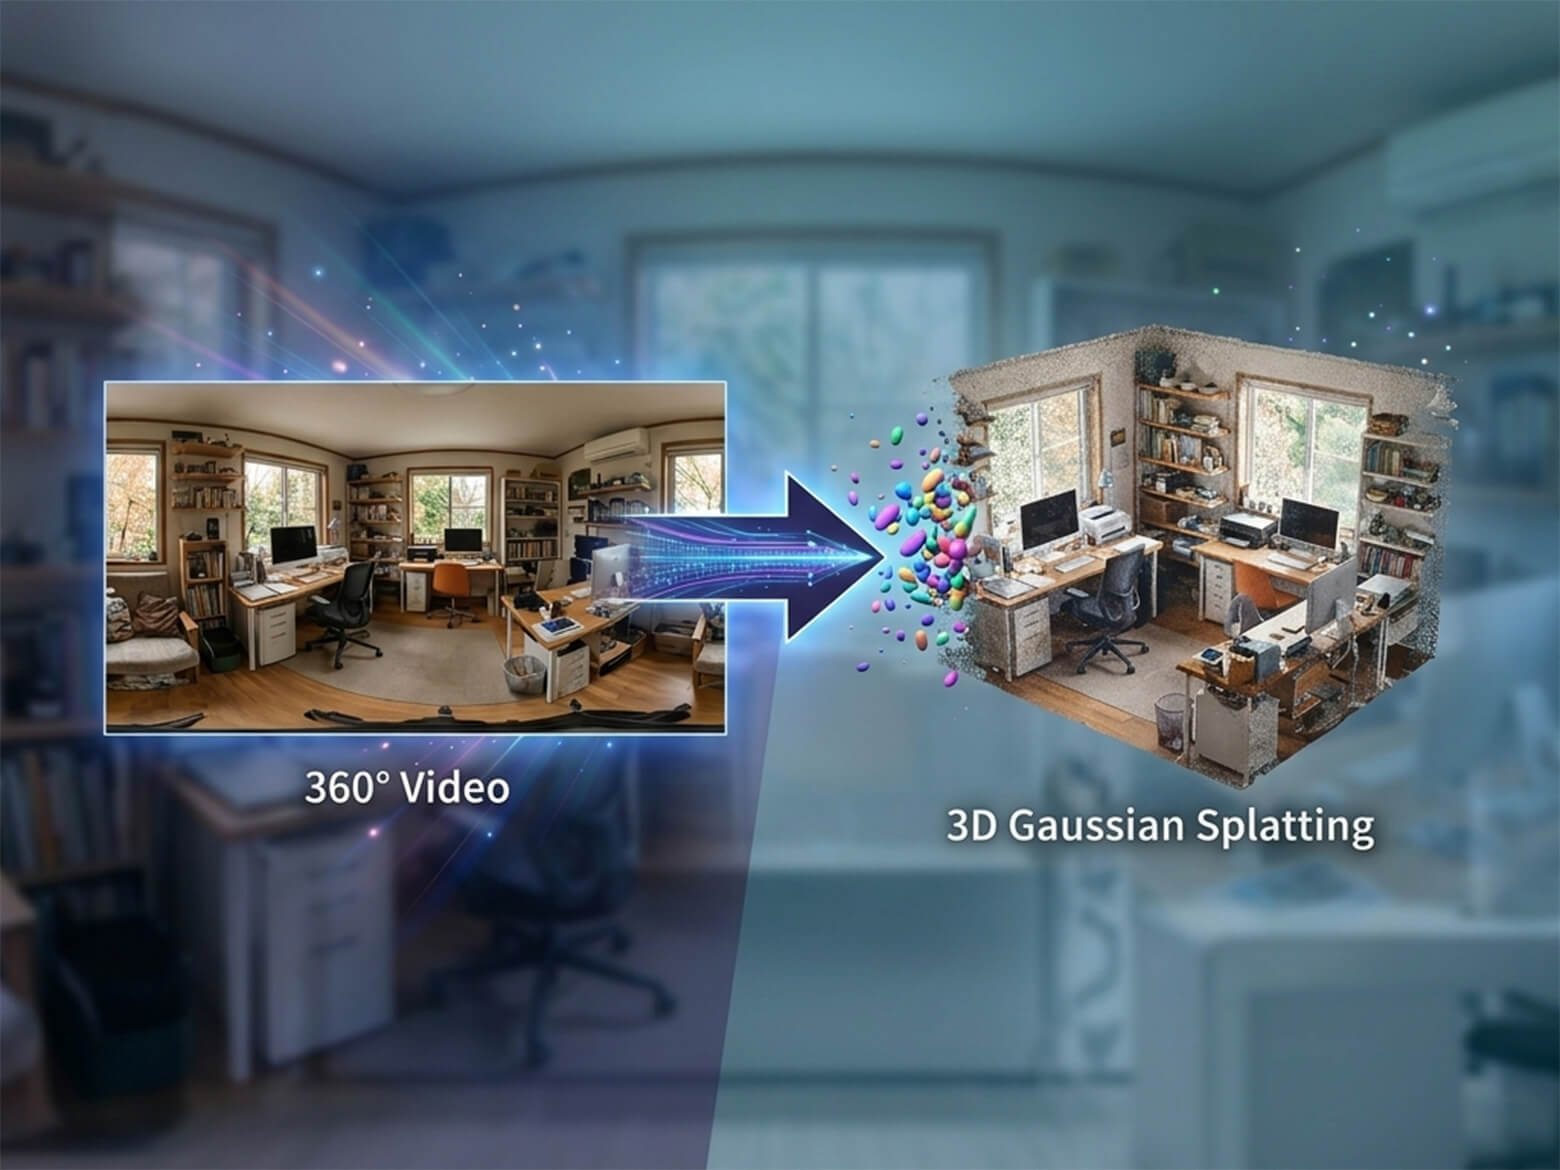
Gaussian Splatting is a technique for reconstructing relatively wide outdoor scenes in 3D, and it has been gaining significant attention recently.
In this article, we introduce the minimum workflow to get started with Gaussian Splatting, aimed at those who want to give it a try.
Most of the tools featured here are free to use (some optional features are paid), so feel free to jump right in.
Example Output
Environment
PC Specifications (Example Configuration)
Requirement: The tools used in this workflow require Windows as the operating system.
The following is one example of a working configuration.
Item
Example
OS
Windows 11
GPU
NVIDIA GeForce RTX 4070 SUPER
CPU
AMD Ryzen7 8700G
RAM
32 GB
360° Camera
Any of the following 360° cameras can be used. 8K or higher resolution is recommended for best results.
Tool that automates each step of the Gaussian Splatting pipeline
※ Updated: April 20, 2026 The information in this article is current as of April 20, 2026. Any specification changes occurring after this date should be independently verified by the reader.
Free distribution of pre-built binaries for LichtFeld Studio v0.5.1 has ended. v0.4.0 remains available for free download. To use v0.5.1, you must either purchase a paid license or build it from source.
If you want to try the latest features available on GitHub, or try v0.5.1 before purchasing a license, please refer to the notes below and try building it yourself.
Tip 1
Also note: although not mentioned in the official build instructions, Perl may be required. Install it from Strawberry Perl.
Be aware that the cmake bundled with Perl may take precedence over your system cmake, so first temporarily rename C:\Strawberry\c\bin\cmake.exe, and delete it only if necessary. To be safe, restart your PC afterward.
Tip 2
In the official documentation’s Clone repository section, the following command did not always download all required files correctly in the author’s environment: git clone https://github.com/MrNeRF/LichtFeld-Studio
Instead, to avoid missing submodule downloads, it is recommended to add the –recursive flag, or use a client tool such as Fork or GitHub Desktop: git clone –recursive https://github.com/MrNeRF/LichtFeld-Studio
Tip 3
Note: skip the git checkout v0.4.0 command in the Checkout stable version step.
The build process takes a long time, so plan to run it when you have plenty of time available.
Overview
Gaussian Splatting generally involves the following 4 steps:
#
Step
Description
1
Capture
Record the scene with a 360° camera
2
SfM (Structure from Motion)
Estimate the position of each image
3
Point Cloud Generation
Generate a point cloud from the estimated camera positions
4
Gaussian Splatting
Generate a 3D Gaussian Splatting model from the point cloud
Step 1. Capture & Video Export
Just as with normal shooting, record the scene with your 360° camera. To keep processing time manageable, it is recommended to start with a short video under 1 minute while you get familiar with the workflow.
Export the recorded footage in Equirectangular format using the PC application provided by your camera manufacturer.
Step 2. SfM and Point Cloud Generation
In this step, we use 360° Gaussian to estimate camera positions and generate a point cloud.
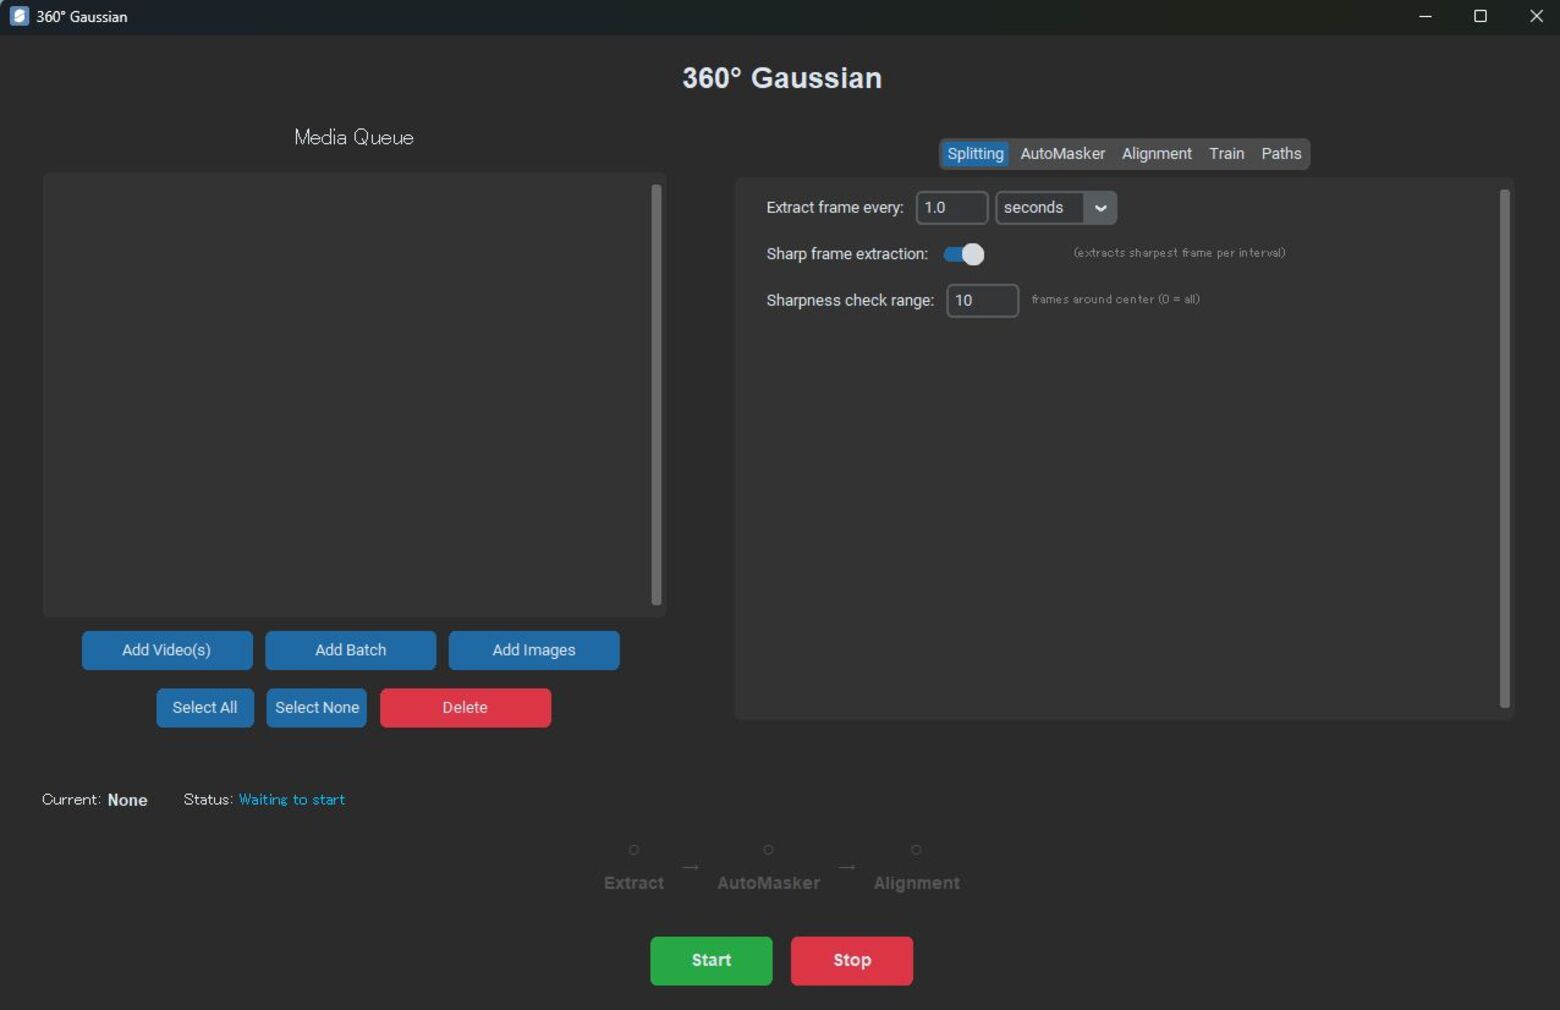
2.1 Frame Extraction
Launch 360° Gaussian and click Add Video(s) to select the Equirectangular video.
Select Splitting and configure the frame extraction settings (e.g., frame interval).
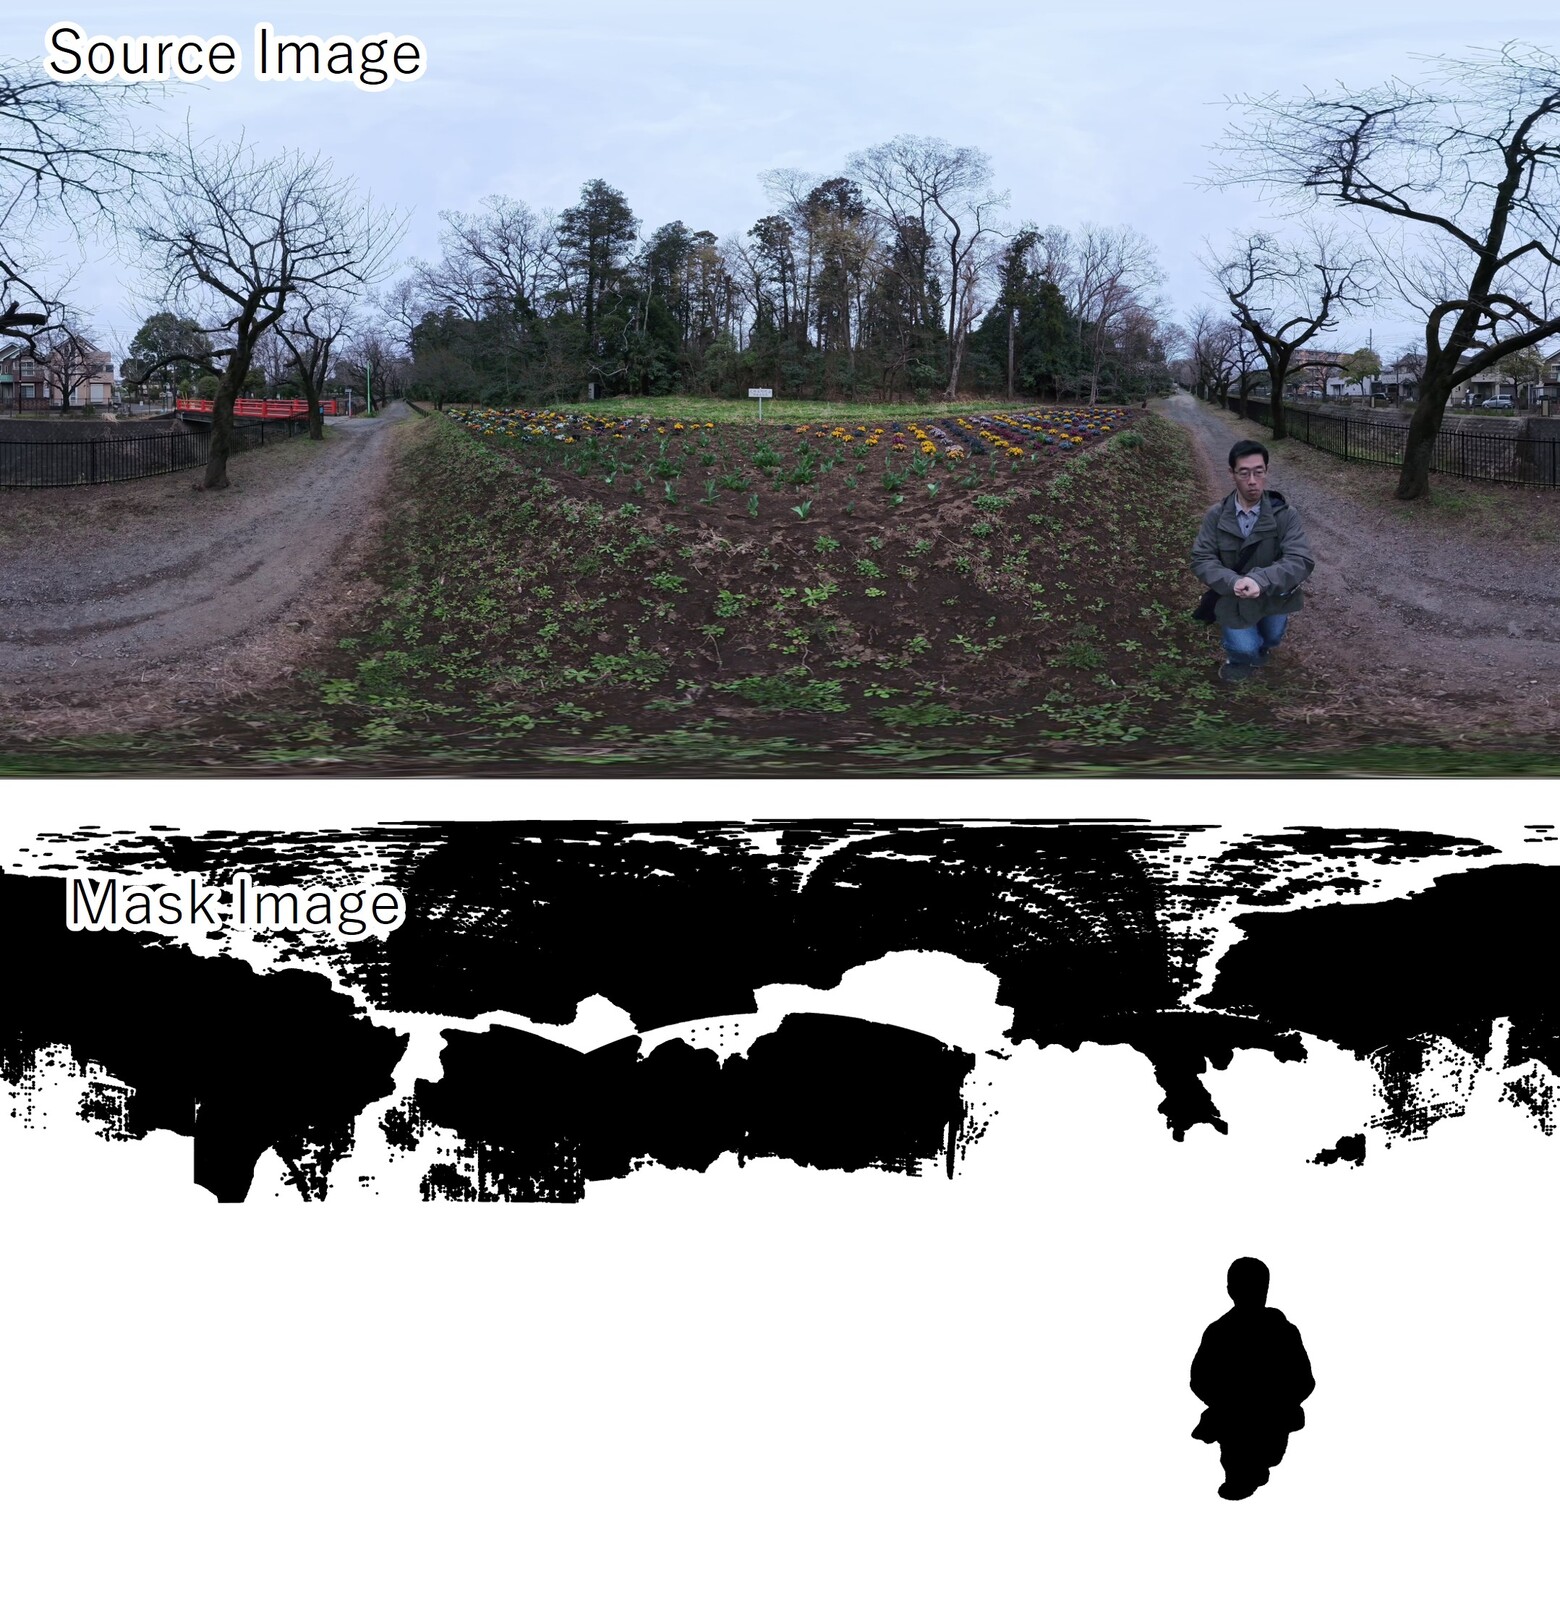
2.2 Image Masking (Optional)
This step automatically masks and excludes areas not needed for Gaussian Splatting (such as people or the sky). While not mandatory, applying masks can improve camera position estimation accuracy and the overall quality of the 3D model.
If masking is not needed, you can skip to 2.3 SfM Configuration & Execution.
Click AutoMasker and turn on Use AutoMasker
Enter the keywords for areas to exclude in Detection Keywords (e.g., person.sky)
2.3 SfM Configuration & Execution
360° Gaussian allows you to choose and combine multiple tools for both SfM and Gaussian Splatting training. Here we introduce our recommended settings when using the free tools SphereSfM and LichtFeld Studio.
Click Alignment
Set Training Method to No Training and SfM to SphereSFM
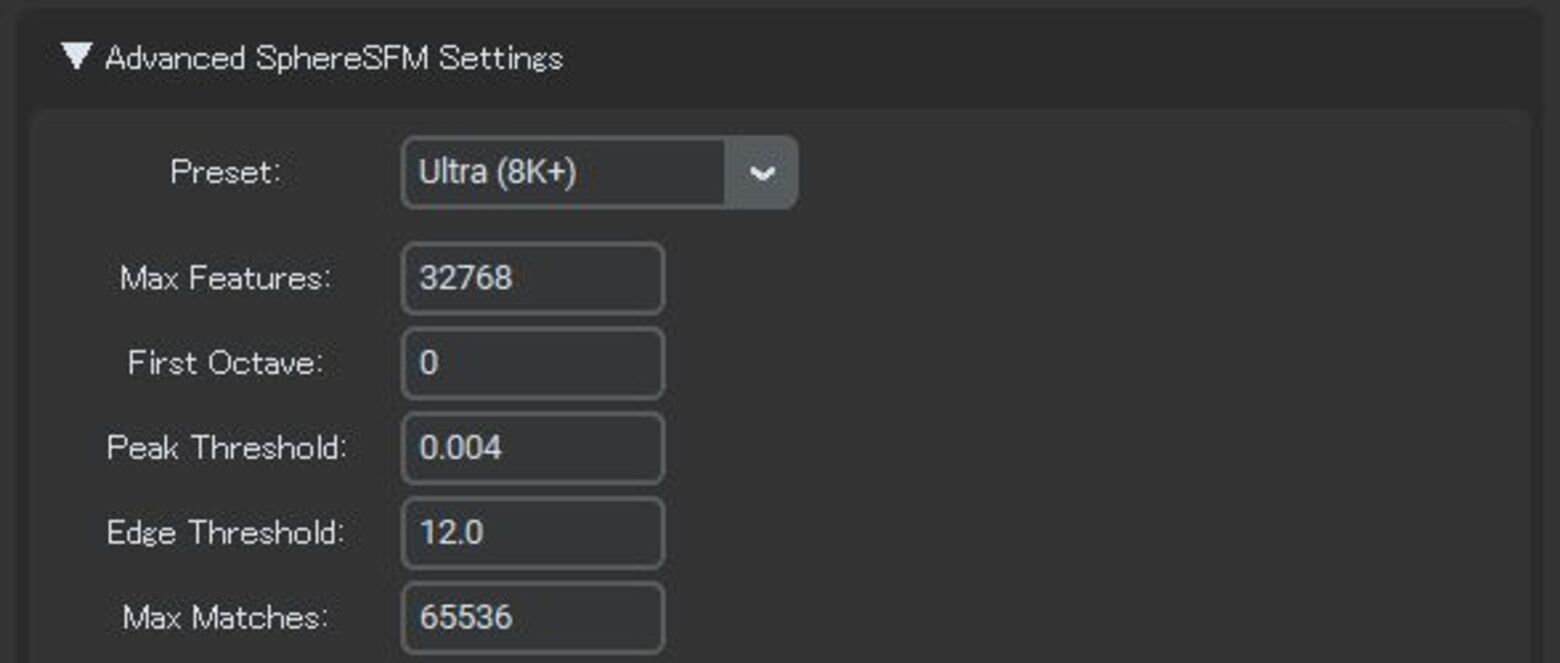
Open Advanced SphereSFM Setting and select the appropriate Preset for your camera resolution (e.g., Ultra (8K) for 8K footage)
Set Matcher to sequential. The other settings can be left at their defaults.
(The image below shows an example of the settings panel)
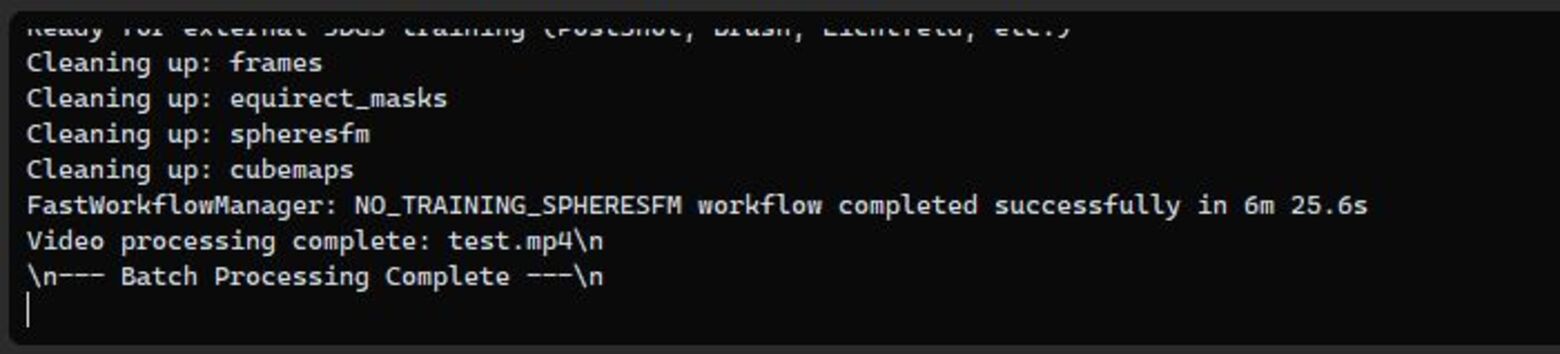
Once all settings are configured, click Start to run SfM.
When processing is complete, Batch Processing Complete will appear in the console window at the bottom of the screen.
Verify that the camera positions and point cloud have been generated correctly.
Step3. Gaussian Splatting
3.1 Loading the Data
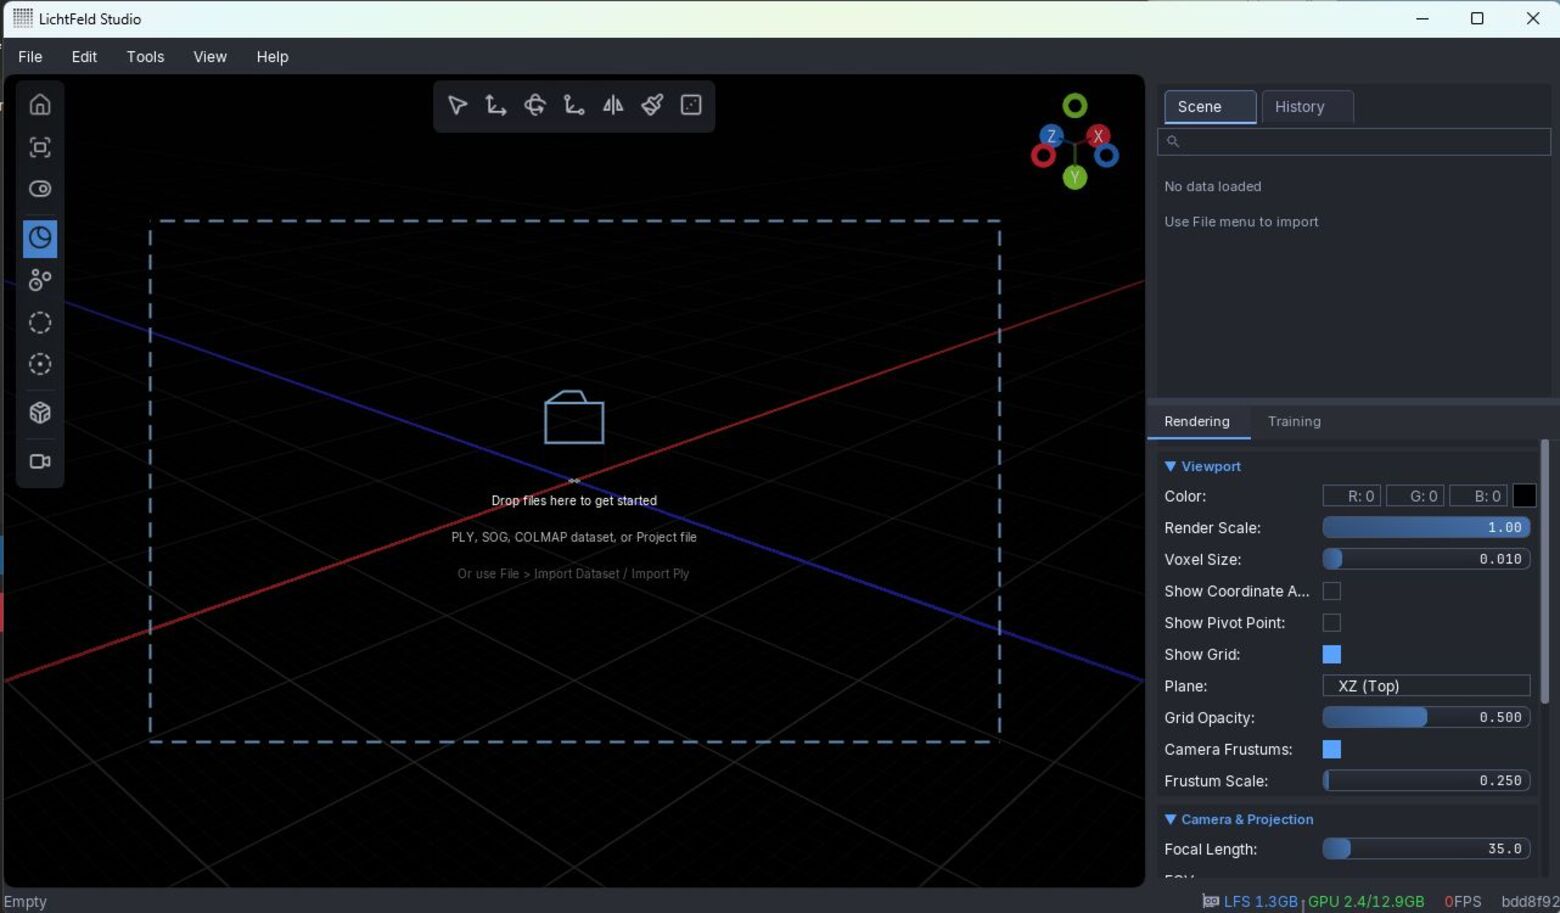
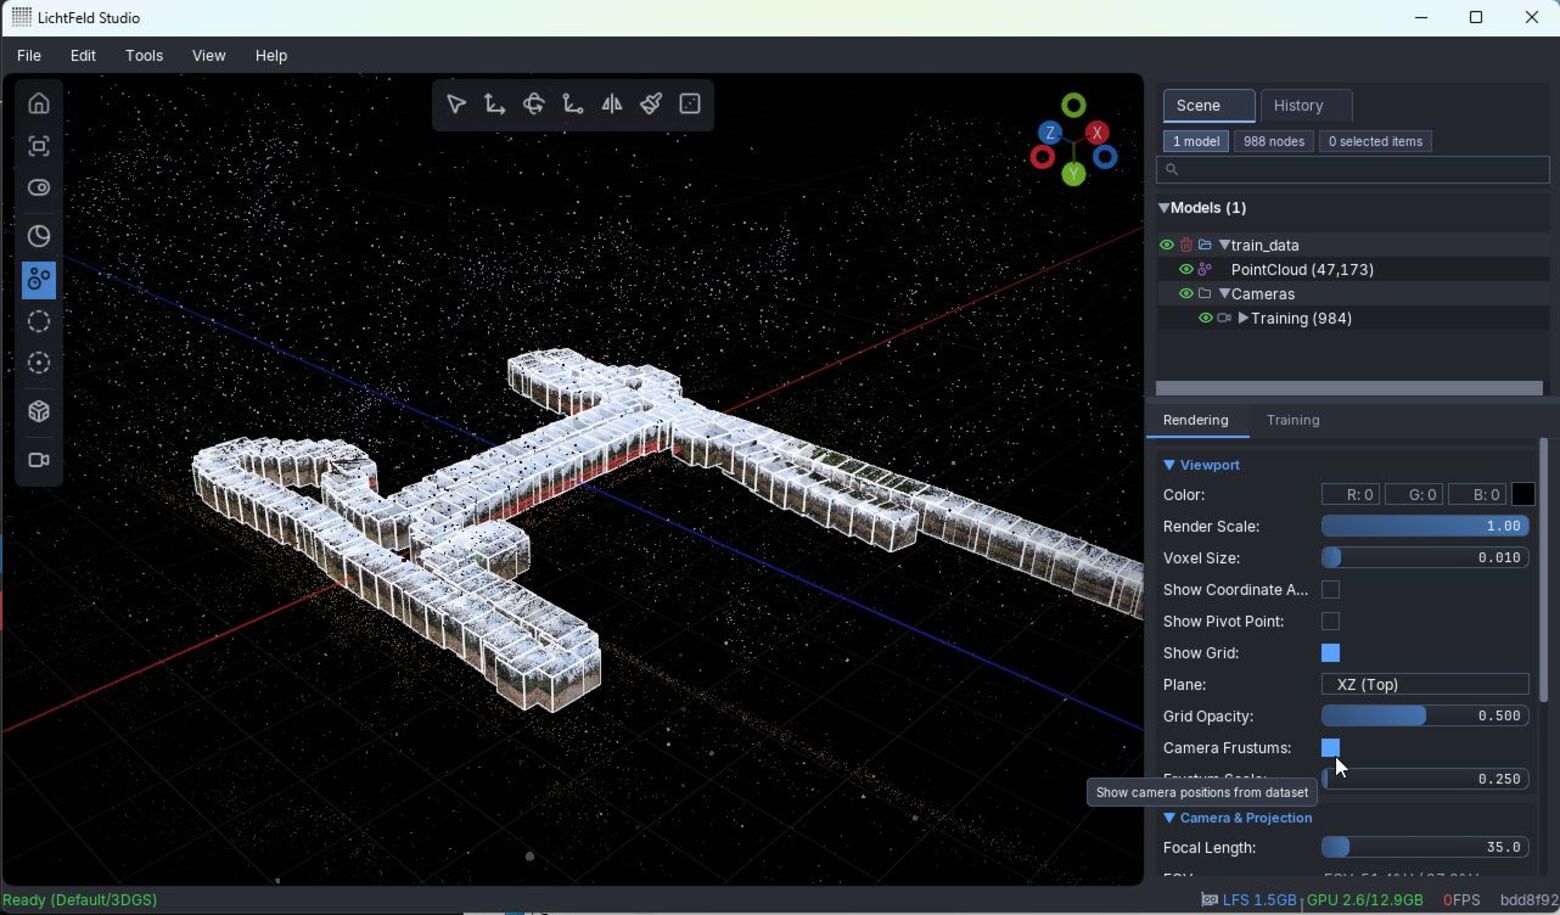
Launch LichtFeld Studio
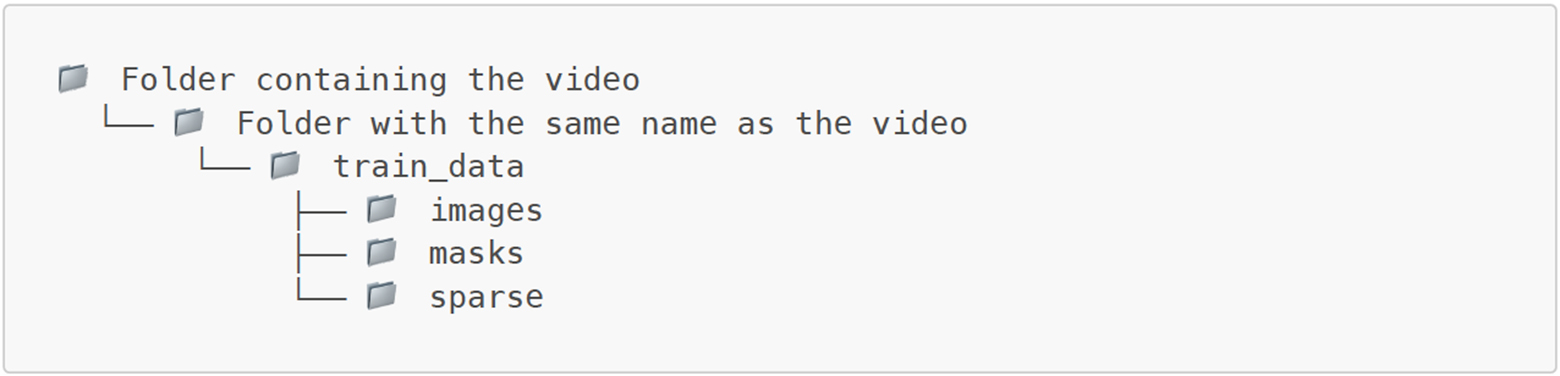
Drag and drop the train_data folder generated above onto the window
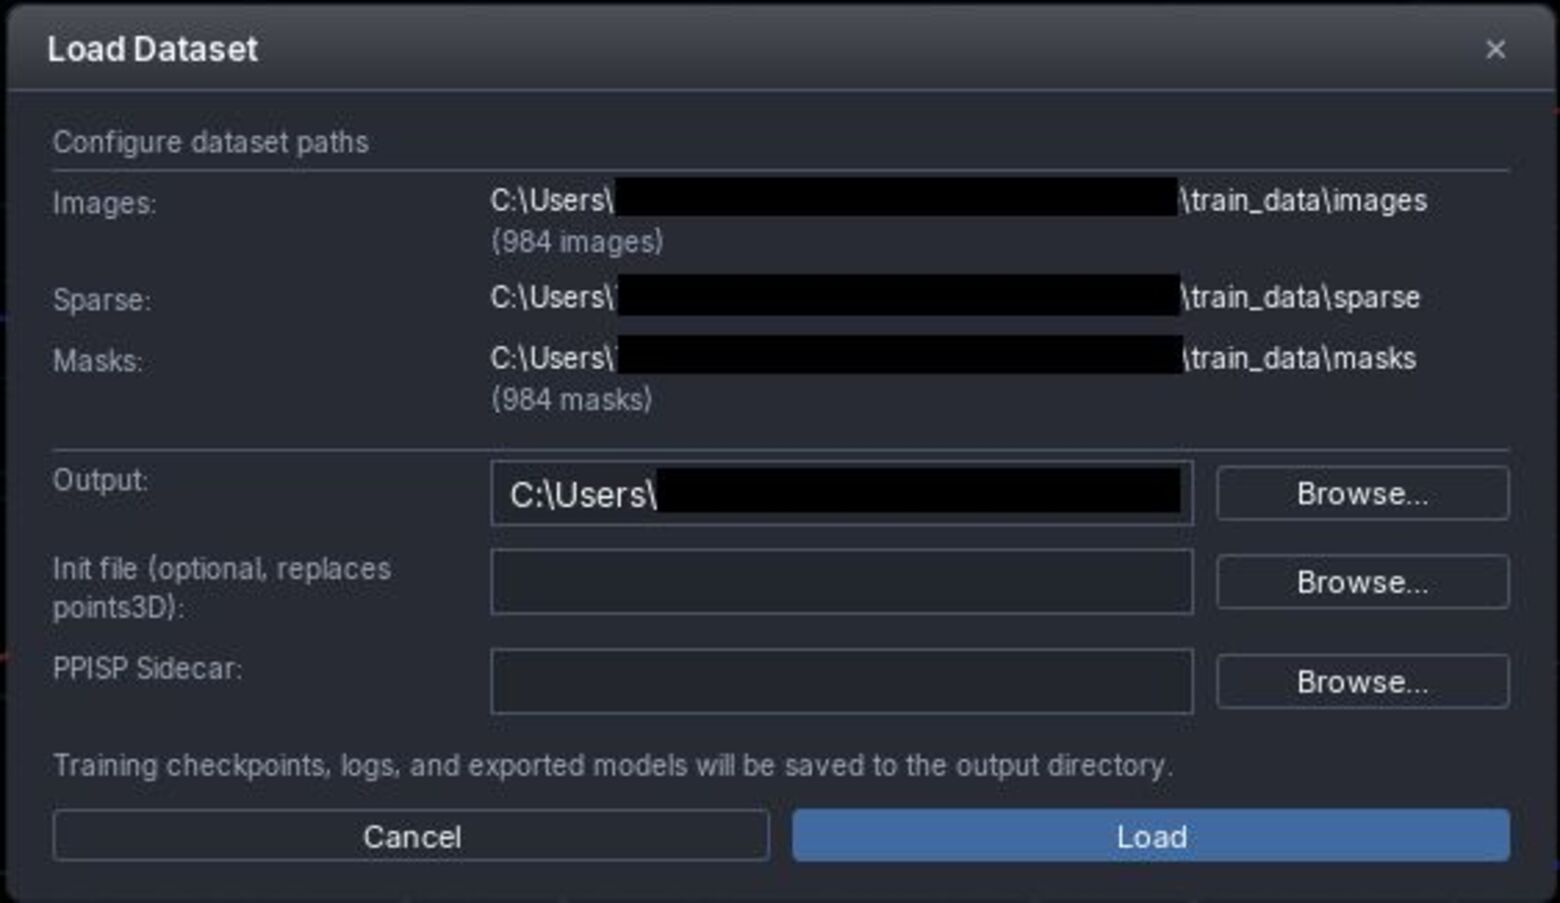
When the Load DataSet dialog appears, click Load
Verify that the point cloud and images have been loaded correctly.
If you do not need to display the camera images, uncheck Camera Frustum in the Rendering tab on the right side of the screen.
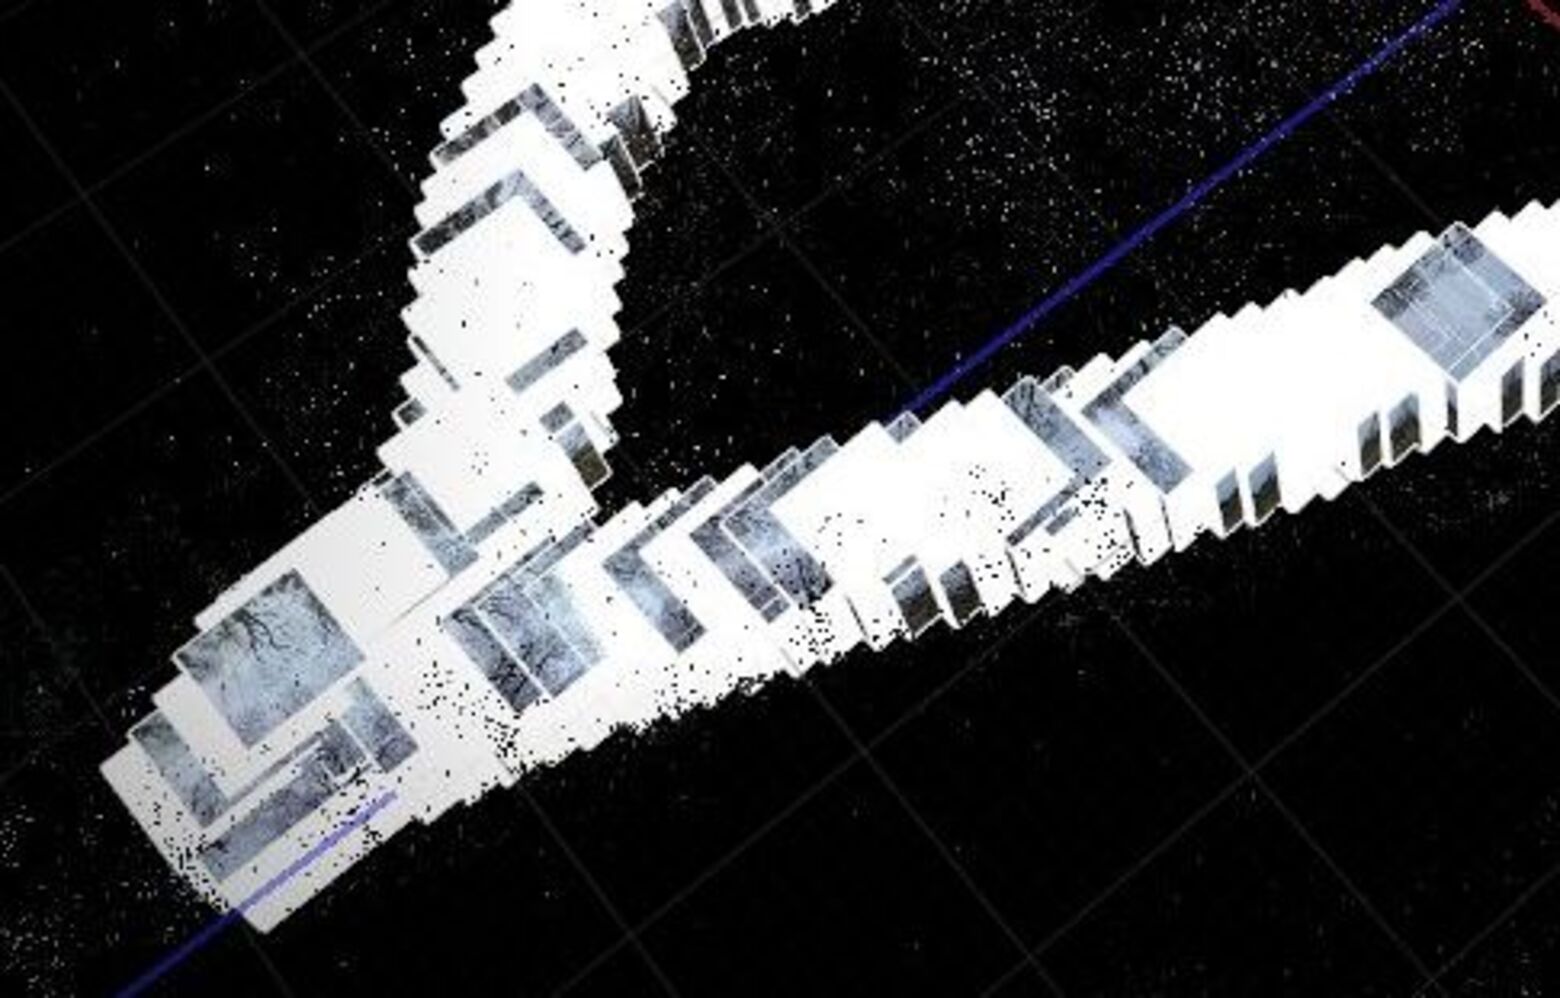
⚠Note
If loading is still in progress, some faces of the cube will have no images displayed. Starting Gaussian Splatting training in this state may cause LichtFeld Studio to crash.
3.2 Training Configuration
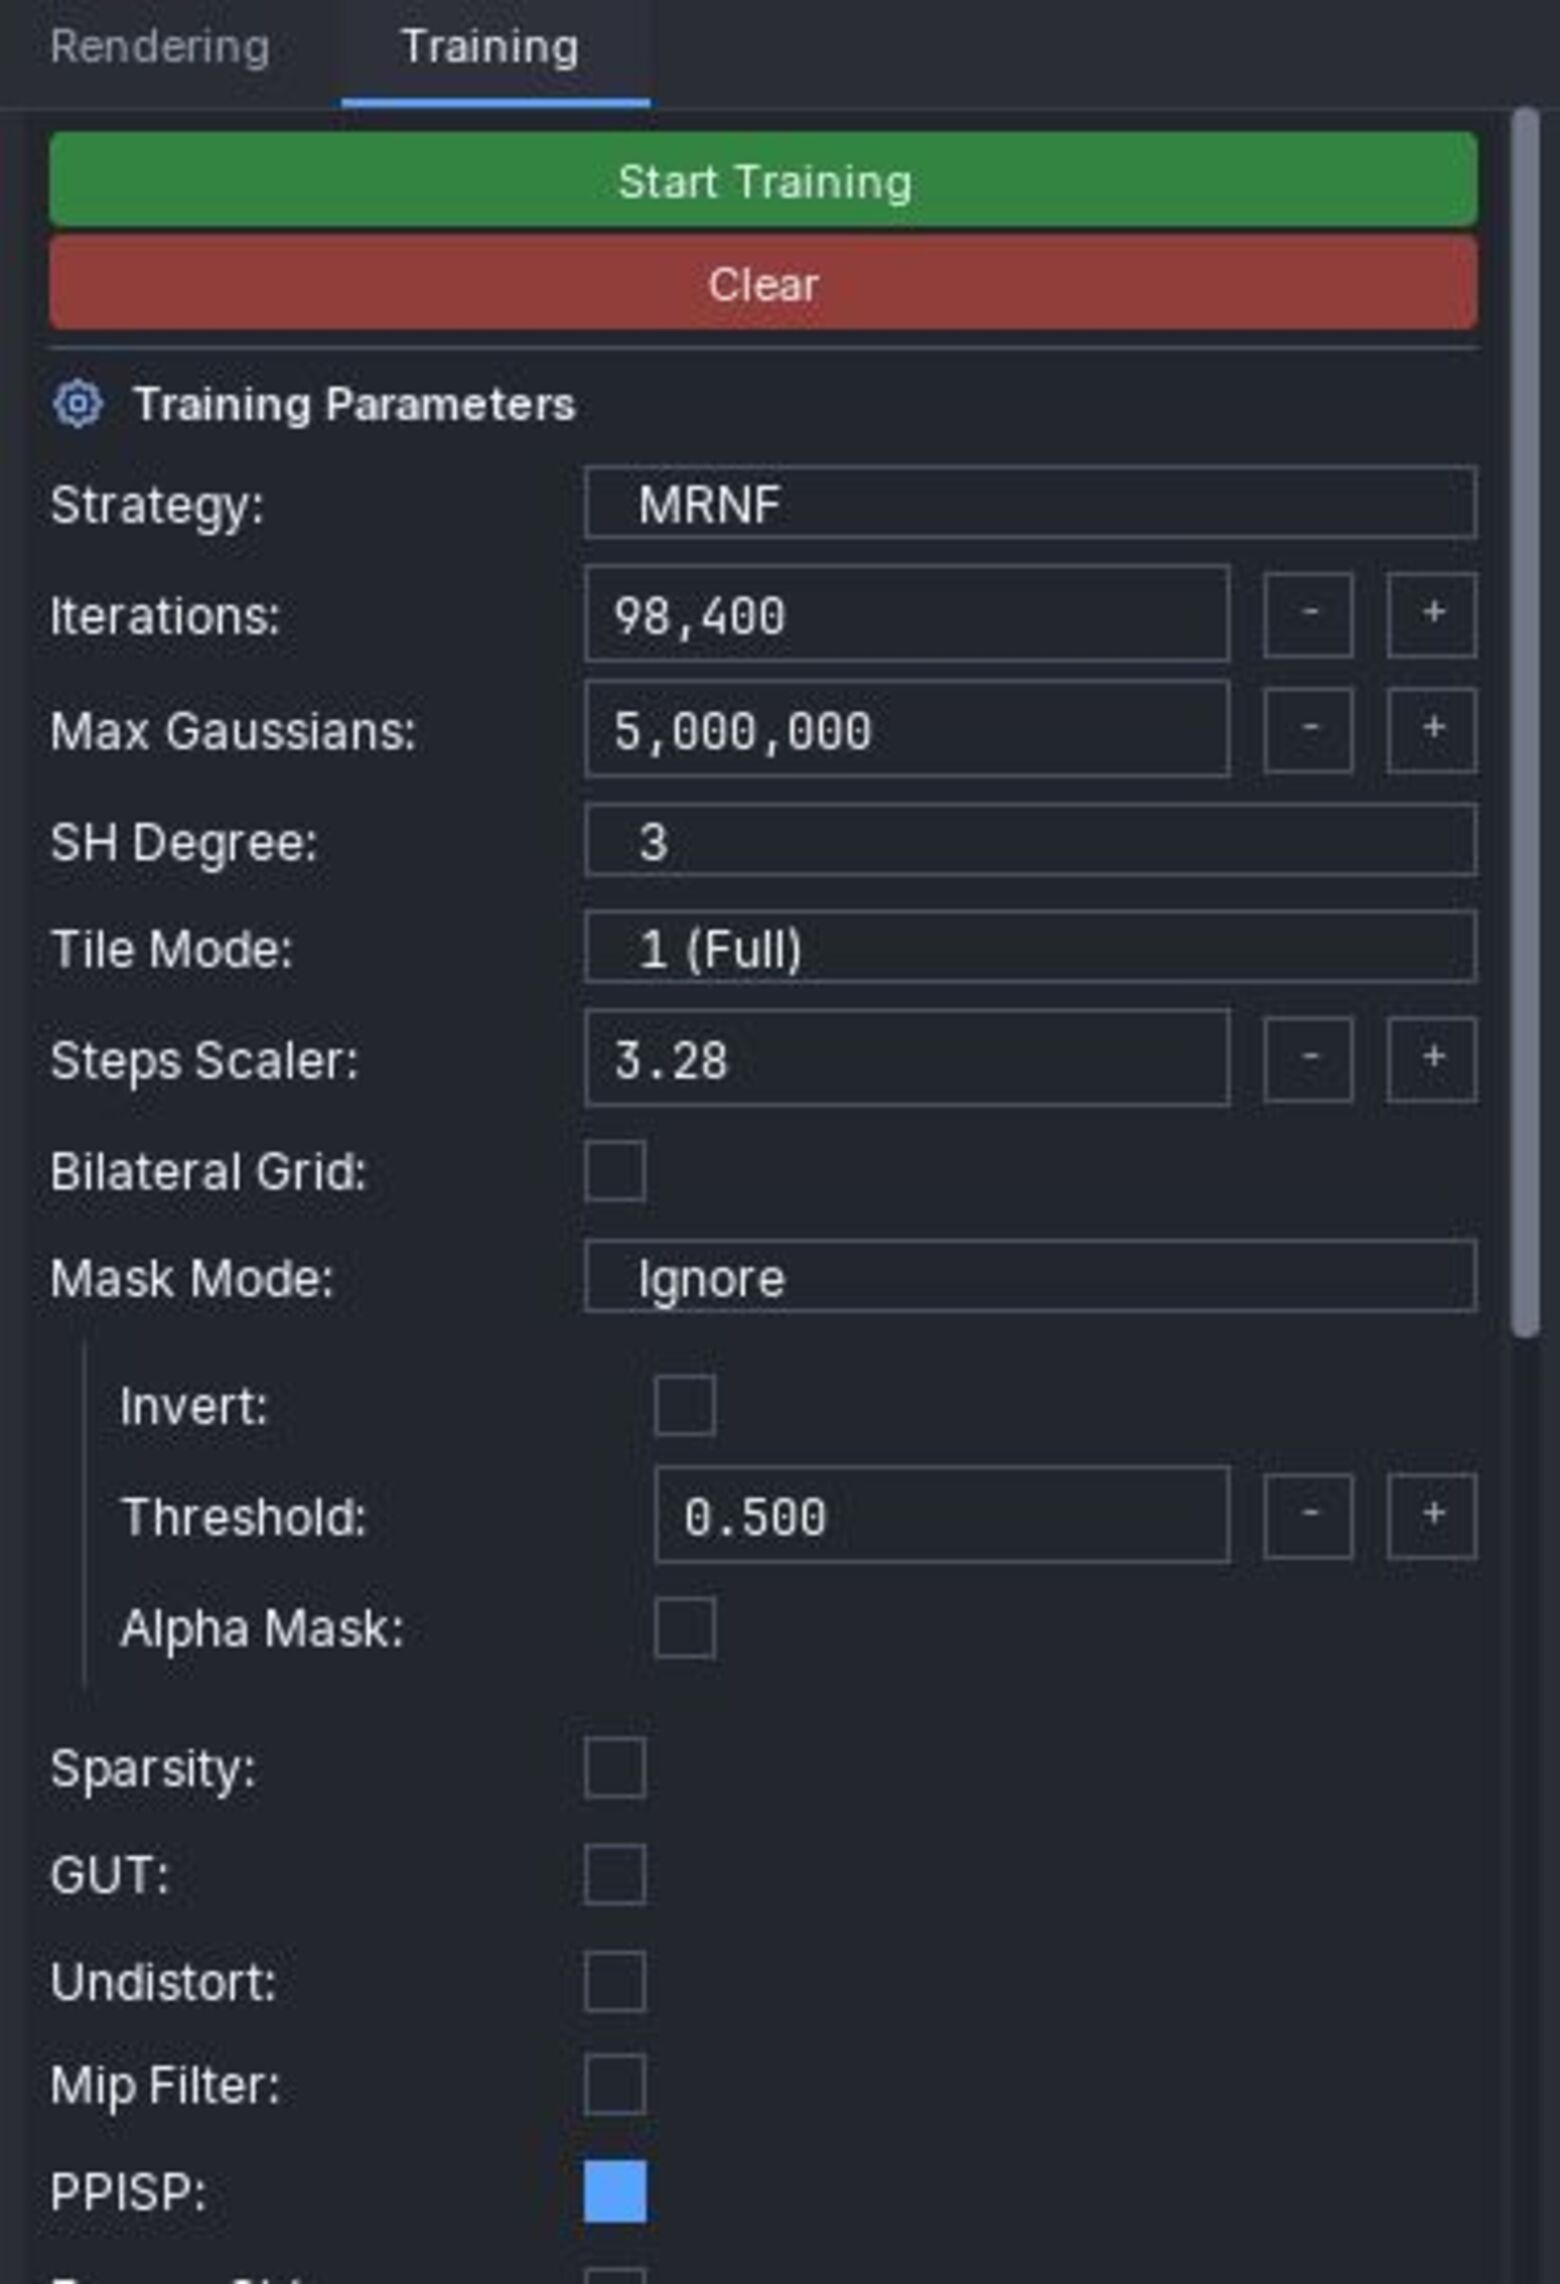
Click the Training tab
Select MRNF for Strategy
Set Steps Scaler as appropriate (as a guide, use number of images / 300 when you have more than 300 images)
Max Gaussians can generally be left at the default value.
Optional Settings:
Only apply the following if you created mask images with AutoMasker.
Mask Mode → Set to Ignore
Use Alpha as Mask → Uncheck
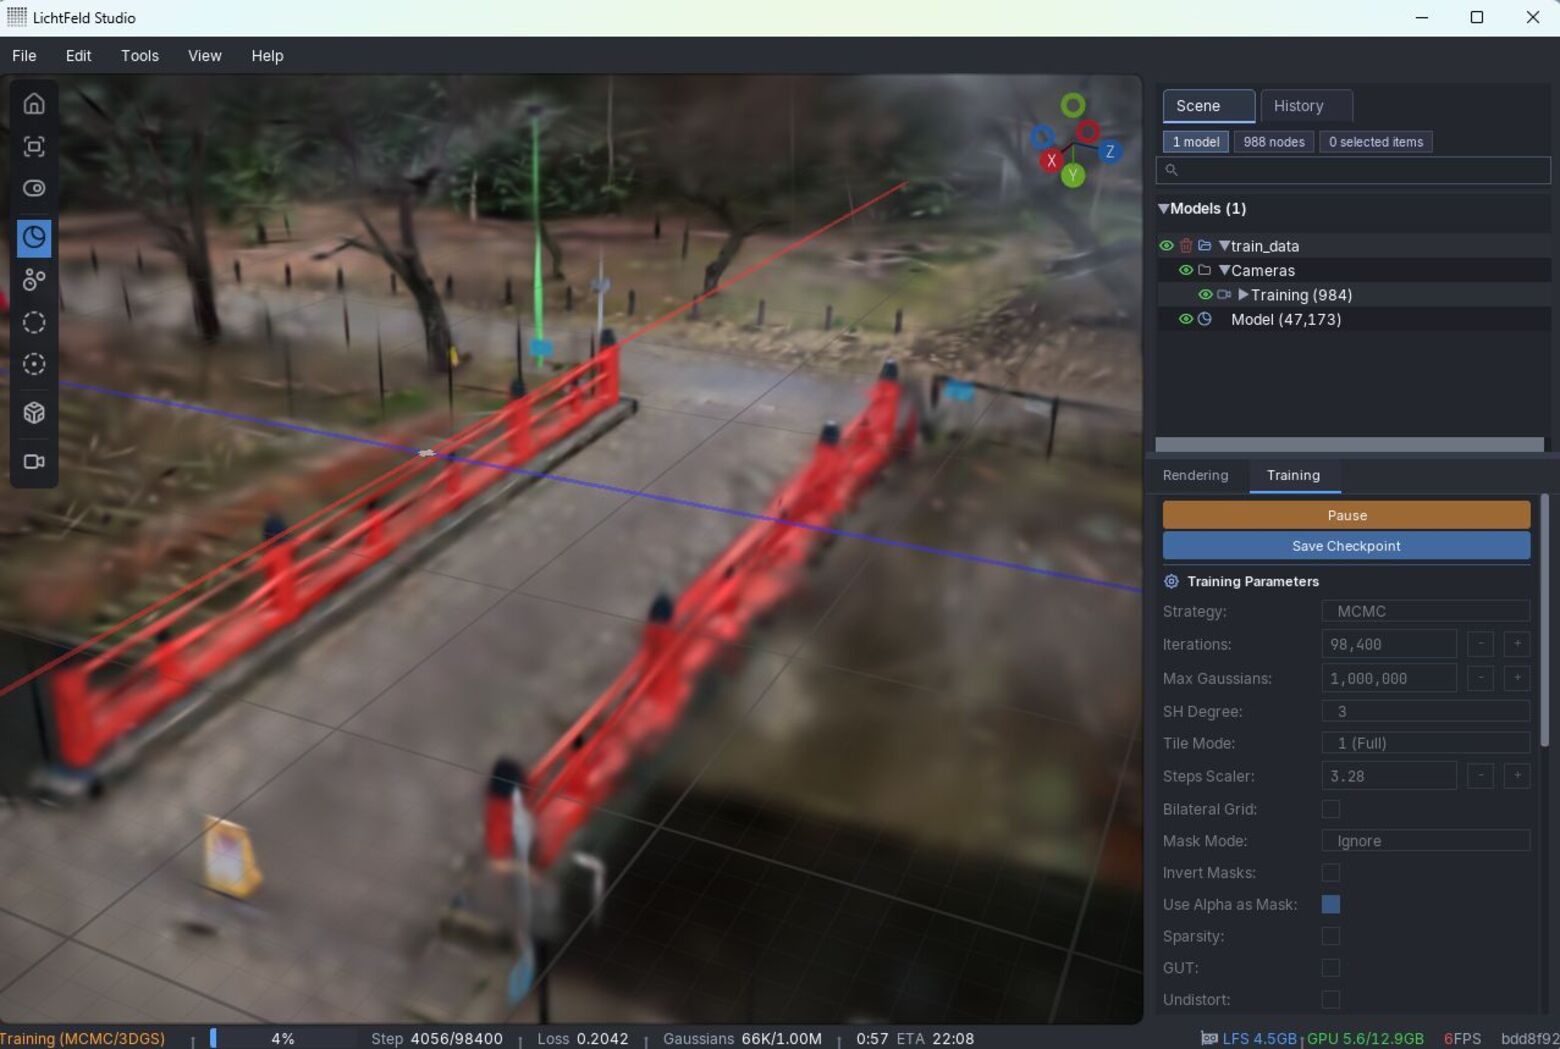
3.3 Running the Training
Use the mouse to zoom in on the area you want to observe during training
Click Start Training to begin
The display will be blurry at first, but will gradually become clearer as steps progress. Training will stop automatically when the step limit is reached.
To save progress partway through, click Save Checkpoint to record the current state.
3.4 Output Examples
Below are links to 3D Gaussian Splatting models actually generated using the workflow described in this article. You can interact with them directly in your browser via SuperSplat.
In this article, we introduced the basic end-to-end workflow for generating 3D Gaussian Splatting from 360° images. By using this workflow as a starting point and adjusting the settings, you can apply it to a wide variety of scenes.
For more advanced settings and techniques to further improve quality, please refer to the following articles: